Search This Blog

Friday, March 22, 2013

How to test DB Partitioning Purging feature in SOA 11g


This procedure should help you quickly setup DB partitioning SOA 11g , 
Refer to the URL's given below for more information on this.
http://docs.oracle.com/cd/E29505_01/admin.1111/e10226/soaadmin_partition.htm#CJHFJDII
http://www.oracle.com/technetwork/middleware/bpm/learnmore/soa11gstrategy-1508335.pdf


Step#1
First two create two table spaces so that data based on the date can go in to different partitions.

CREATE TABLESPACE soa_ts_before_2013_march
DATAFILE '/fmw11g/db/oradata/db1123/soa_ts_before_2013_march.dbf'
SIZE 1G
REUSE
AUTOEXTEND ON
NEXT 128M
BLOCKSIZE 8192
EXTENT MANAGEMENT LOCAL AUTOALLOCATE
SEGMENT SPACE MANAGEMENT AUTO;


CREATE TABLESPACE soa_ts_after_2013_march
DATAFILE '/fmw11g/db/oradata/db1123/soa_ts_after_2013_march.dbf'
SIZE 1G
REUSE
AUTOEXTEND ON
NEXT 128M
BLOCKSIZE 8192
EXTENT MANAGEMENT LOCAL AUTOALLOCATE
SEGMENT SPACE MANAGEMENT AUTO;


GRANT UNLIMITED TABLESPACE TO DEV1116_SOAINFRA;

Step #2
You have to modify the table creation scripts so that it contains partitioning information ,

This is the sample table creation script with partions , as you may have existing data , this data needs to be copied to
a temporary table and the main table has to be recreated with the partitioning information , after the table
is created you may to have to enable ENABLE ROW MOVEMENT to move the rows across partitions
CREATE TABLE WFTASK_t PARTITION BY RANGE (COMPOSITECREATEDTIME) (
PARTITION PART1_BEFORE_2013_MARCH VALUES LESS THAN ('31-MAR-13 12.00.00.000000 AM')
TABLESPACE soa_ts_before_2013_march,
PARTITION PART1_AFTER_2013_MARCH VALUES LESS THAN ('01-MAR-15 12.00.00.000000 AM')
TABLESPACE soa_ts_after_2013_march
)
NOLOGGING
AS
SELECT * FROM WFTASK;

RENAME WFTASK TO WFTASK_d;

RENAME WFTASK_t TO WFTASK;

DROP TABLE WFTASK_d cascade CONSTRAINTS;

alter table WFTASK ENABLE ROW MOVEMENT;


These are the tables that needs to be partitioned for SOA Infrastructure , BPEL , Mediator , Human Workflow
for the group related information on these tables , please refer to the URL ,
http://docs.oracle.com/cd/E29505_01/admin.1111/e10226/soaadmin_partition.htm#CJHFJDII

SOA Infrastructure
---------------------

COMPOSITE_INSTANCE,PARTITION_DATE
REFERENCE_INSTANCE,CPST_PARTITION_DATE
COMPOSITE_INSTANCE_FAULT,CPST_PARTITION_DATE
COMPOSITE_SENSOR_VALUE,CPST_PARTITION_DATE
COMPONENT_INSTANCE,CPST_PARTITION_DATE
REJECTED_MESSAGE,CREATED_TIME
REJECTED_MSG_NATIVE_PAYLOAD,RM_PARTITION_DATE
INSTANCE_PAYLOAD,CREATED_TIME
COMPOSITE_INSTANCE_ASSOC,CREATED_TIME

BPEL Tables
--------------

CUBE_INSTANCE,CPST_INST_CREATED_TIME
CI_INDEXES,CI_PARTITION_DATE
CUBE_SCOPE,CI_PARTITION_DATE
DOCUMENT_CI_REF,CI_PARTITION_DATE
AUDIT_TRAIL,CI_PARTITION_DATE
AUDIT_DETAILS,CI_PARTITION_DATE
DLV_SUBSCRIPTION,CI_PARTITION_DATE
WORK_ITEM,CI_PARTITION_DATE
AUDIT_COUNTER,CI_PARTITION_DATE
WI_FAULT,CI_PARTITION_DATE
DLV_MESSAGE,RECEIVE_DATE
HEADERS_PROPERTIES,DLV_PARTITION_DATE
DOCUMENT_DLV_MSG_REF,DLV_PARTITION_DATE
XML_DOCUMENT,DOC_PARTITION_DATE

Mediator Table
-----------------

MEDIATOR_INSTANCE,COMPOSITE_CREATION_DATE
MEDIATOR_CASE_INSTANCE,MI_PARTITION_DATE
MEDIATOR_CASE_DETAIL,MI_PARTITION_DATE
MEDIATOR_AUDIT_DOCUMENT,MI_PARTITION_DATE
MEDIATOR_DEFERRED_MESSAGE,CREATION_DATE
MEDIATOR_PAYLOAD,CREATION_TIME

Human Workflow
--------------------

WFTASK,COMPOSITECREATEDTIME
WFTASK_TL,COMPOSITECREATEDTIME
WFTASKHISTORY,COMPOSITECREATEDTIME
WFTASKHISTORY_TL,COMPOSITECREATEDTIME
WFCOMMENTS,COMPOSITECREATEDTIME
WFMESSAGEATTRIBUTE,COMPOSITECREATEDTIME
WFATTACHMENT,COMPOSITECREATEDTIME
WFASSIGNEE,COMPOSITECREATEDTIME
WFREVIEWER,COMPOSITECREATEDTIME
WFCOLLECTIONTARGET,COMPOSITECREATEDTIME
WFROUTINGSLIP,COMPOSITECREATEDTIME
WFNOTIFICATION,COMPOSITECREATEDTIME
WFTASKTIMER,COMPOSITECREATEDTIME
WFTASKERROR,COMPOSITECREATEDTIME
WFHEADERPROPS,COMPOSITECREATEDTIME
WFEVIDENCE,COMPOSITECREATEDTIME
WFTASKASSIGNMENTSTATISTIC,COMPOSITECREATEDTIME
WFTASKAGGREGATION,COMPOSITECREATEDTIME


I created a simple java program to create the sql that can be used to recreate the tables.
Use this java program to generate the table scripts ,


public class GeneratePartionTable {
public GeneratePartionTable() {
super();
}

public static void main(String[] args) {
GeneratePartionTable generatePartionTable = new GeneratePartionTable();
String p2 = "COMPOSITE_INSTANCE,PARTITION_DATE\n" +
"REFERENCE_INSTANCE,CPST_PARTITION_DATE\n" +
"COMPOSITE_INSTANCE_FAULT,CPST_PARTITION_DATE\n" +
"COMPOSITE_SENSOR_VALUE,CPST_PARTITION_DATE\n" +
"COMPONENT_INSTANCE,CPST_PARTITION_DATE\n" +
"REJECTED_MESSAGE,CREATED_TIME\n" +
"REJECTED_MSG_NATIVE_PAYLOAD,RM_PARTITION_DATE\n" +
"INSTANCE_PAYLOAD,CREATED_TIME\n" +
"COMPOSITE_INSTANCE_ASSOC,CREATED_TIME\n" +
"CUBE_INSTANCE,CPST_INST_CREATED_TIME\n" +
"CI_INDEXES,CI_PARTITION_DATE\n" +
"CUBE_SCOPE,CI_PARTITION_DATE\n" +
"DOCUMENT_CI_REF,CI_PARTITION_DATE\n" +
"AUDIT_TRAIL,CI_PARTITION_DATE\n" +
"AUDIT_DETAILS,CI_PARTITION_DATE\n" +
"DLV_SUBSCRIPTION,CI_PARTITION_DATE\n" +
"WORK_ITEM,CI_PARTITION_DATE\n" +
"AUDIT_COUNTER,CI_PARTITION_DATE\n" +
"WI_FAULT,CI_PARTITION_DATE\n" +
"DLV_MESSAGE,RECEIVE_DATE\n" +
"HEADERS_PROPERTIES,DLV_PARTITION_DATE\n" +
"DOCUMENT_DLV_MSG_REF,DLV_PARTITION_DATE\n" +
"XML_DOCUMENT,DOC_PARTITION_DATE\n" +
"MEDIATOR_INSTANCE,COMPOSITE_CREATION_DATE\n" +
"MEDIATOR_CASE_INSTANCE,MI_PARTITION_DATE\n" +
"MEDIATOR_CASE_DETAIL,MI_PARTITION_DATE\n" +
"MEDIATOR_AUDIT_DOCUMENT,MI_PARTITION_DATE\n" +
"MEDIATOR_DEFERRED_MESSAGE,CREATION_DATE\n" +
"MEDIATOR_PAYLOAD,CREATION_TIME\n" +
"WFTASK,COMPOSITECREATEDTIME\n" +
"WFTASK_TL,COMPOSITECREATEDTIME\n" +
"WFTASKHISTORY,COMPOSITECREATEDTIME\n" +
"WFTASKHISTORY_TL,COMPOSITECREATEDTIME\n" +
"WFCOMMENTS,COMPOSITECREATEDTIME\n" +
"WFMESSAGEATTRIBUTE,COMPOSITECREATEDTIME\n" +
"WFATTACHMENT,COMPOSITECREATEDTIME\n" +
"WFASSIGNEE,COMPOSITECREATEDTIME\n" +
"WFREVIEWER,COMPOSITECREATEDTIME\n" +
"WFCOLLECTIONTARGET,COMPOSITECREATEDTIME\n" +
"WFROUTINGSLIP,COMPOSITECREATEDTIME\n" +
"WFNOTIFICATION,COMPOSITECREATEDTIME\n" +
"WFTASKTIMER,COMPOSITECREATEDTIME\n" +
"WFTASKERROR,COMPOSITECREATEDTIME\n" +
"WFHEADERPROPS,COMPOSITECREATEDTIME\n" +
"WFEVIDENCE,COMPOSITECREATEDTIME\n" +
"WFTASKASSIGNMENTSTATISTIC,COMPOSITECREATEDTIME\n" +
"WFTASKAGGREGATION,COMPOSITECREATEDTIME";

String[] lines = p2.split("\n");
for (int i = 0 ; i < lines.length ; i++ ) {
String p1 = "CREATE TABLE --tablename--_t PARTITION BY RANGE (--key--) (\n" +
" PARTITION PART1_BEFORE_2013_MARCH VALUES LESS THAN ('01-MAR-13 12.00.00.000000 AM') \n" +
"TABLESPACE soa_ts_before_2013_march,\n" +
" PARTITION PART1_AFTER_2013_MARCH VALUES LESS THAN ('01-MAR-15 12.00.00.000000 AM') \n" +
"TABLESPACE soa_ts_after_2013_march \n" +
")\n" +
"NOLOGGING\n" +
"AS\n" +
"SELECT * FROM --tablename--;\n" +
"\n" +
"RENAME --tablename-- TO --tablename--_d;\n" +
"\n" +
"RENAME --tablename--_t TO --tablename--;\n" +
"\n" +
"DROP TABLE --tablename--_d cascade CONSTRAINTS;\n" +
"\n" +
"alter table --tablename-- ENABLE ROW MOVEMENT;";
String[] lines2 = lines[i].split(",");

p1= p1.replaceAll("--tablename--", lines2[0]);
p1 = p1.replaceAll("--key--", lines2[1]) ;

System.out.println(p1);
System.out.println();
}

}
}

Get the o/p of this to a text file and run this sql file as the user
DEV1116_SOAINFRA ,

Step#3
Run some composites , like a simple helloworld , a simple workflow application etc (wanted to keep this composite in the running state), 
Run the soa_exec_verify.sql to verify the partionins

You have to modify the soa_exec_verify.sql script , 
with the partition name , i.e.
mySoa_drv_list(1) := 'PART1_BEFORE_2013_MARCH';

CREATE DIRECTORY PART_DIR AS '/tmp/verify'

grant read,write on directory PART_DIR to public;

Run the script ,

sqlplus dev1116_soainfra/Welcome1 @soa_exec_verify.sql

If you are running the script , you may get an error like this ,

ORA-20000: ERROR :TEMP TABLES NOT EMPTY. PLEASE TRUNCATE TEMP TABLES AFTER EXECUTING ROW MOVEMENT PROCEDURES(IF APPLICABLE)
ORA-06512: in "PROD_SOAINFRA.VERIFY_SOA", line 244

Please run the pl/sql code below to remove the temporary tables ,

DECLARE
BEGIN
verify_soa.trunc_verify1_temp_tables;
END;

/

DECLARE
BEGIN
verify_soa.trunc_verify2_temp_tables;
END;

/

Open the file /temp/verify/SOA_PART1_BEFORE_2013_MARCH_LOG_1 and look for the string "FAIL"
if you see ant FAIL word that means there are some running instances which you need to move to
another parition.

Moving Active, Long Running Instances to a Different Partition

Immediately after running the soa_exec_verify.sql run the exec_row_movement_1 movement scripts to move the running instances to
another parition ,

declare
new_partition_date timestamp;
partition_name varchar2(100);
BEGIN
new_partition_date := to_timestamp('2013-04-09','YYYY-MM-DD');
partition_name := 'PART1_BEFORE_2013_MARCH' ;
verify_soa.exec_row_movement_1(partition_name => partition_name,
new_partition_date => new_partition_date);
commit;
END;

Please note that you should always run the exec_row_movement_1 scripts immediately after running the soa_exec_verify.sql
scripts.exec_row_movement_1 scripts uses the temporary tables created by soa_exec_verify.sql scripts.

Simlarly run the script soa_exec_verify.sql with the input as 2 to run against Group 2 tables ,
and run the exec_row_movement_2 procedure to move the rows of group2 to another partition.

declare
new_partition_date timestamp;
partition_name varchar2(100);
BEGIN
new_partition_date := to_timestamp('2013-04-09','YYYY-MM-DD');
partition_name := 'PART1_BEFORE_2013_MARCH' ;
verify_soa.exec_row_movement_2(partition_name => partition_name,
new_partition_date => new_partition_date);
END;


Friday, October 05, 2012

How to Capture offending sql of ORA-00001 error


Using sql*plus run the sql
 
alter system set events='0001 trace name errorstack level 12';

Now login to other session and run the command ,

SQL> oradebug setmypid
Statement processed.
SQL> oradebug eventdump system
1 trace name ERRORSTACK level 12 >>>> This indicates event is present in the DB

Please also check the folloine note , to check for the events in the db
How To List All The Named Events Set For A Database (Doc ID 436036.1)

Simulate the error of ORA-00001 ,

create table a1(a number primary key);
insert into a1 values (1);
commit;


SQL> insert into a1 values (1);
insert into a1 values (1)
*
ERROR at line 1:
ORA-00001: unique constraint (SCOTT.SYS_C0079247) violated

SQL> show parameters user_dump_dest

NAME                                 TYPE        VALUE
------------------------------------ ----------- ------------------------------
user_dump_dest                       string      /home/ias/oracle/product/10.2.0/db10gr2/admin/db10gr2/udump

In the latest file you will find the entries as ,

*** 2012-10-05 14:00:11.038
ksedmp: internal or fatal error
ORA-00001: unique constraint (SCOTT.SYS_C0079247) violated
Current SQL statement for this session:
insert into a1 values (1)
----- Call Stack Trace -----

Turn off the debug logs ,
SQL> alter system set events='1 trace name errorstack off';

To confirm whether the event is off or not run the following ,

SQL> oradebug setmypid
Statement processed.
SQL> oradebug eventdump system

Statement processed.

Monday, September 24, 2012

Using DocFetcher tool as local search engine


http://docfetcher.sourceforge.net/en/index.html

DocFetcher is an open source desktop search application that runs on Microsoft Windows, Mac OS X and Linux.
It is written in Java and has a Standard Widget Toolkit based graphical user interface.

DocFetcher's indexing and searching facilities are based on Apache Lucene, a widely used open source search engine.
Contents

    1 Features
    2 Portability
    3 Pairing of HTML files
    4 See also
    5 External links

Features

    Supports all major document formats, including PDF, HTML, Microsoft Office and OpenOffice.org
    Supported archive formats: zip, 7z, rar, tar.*
    Can search in Outlook emails (PST files)
    Can be customized to index any kind of source code file
    Automatically updates its indexes whenever files are modified
    Exclusion of files from indexing based on regular expressions

Portability

DocFetcher is available as a portable version, which allows the user to bundle DocFetcher and his or her personal files in order to create a portable and searchable "document repository". Portable means the user may for instance carry around this repository on a USB drive, or a synchronize it over multiple computers via a file synchronization service. Also, due to the fact that DocFetcher is Java-based, this repository can be accessed from different platforms, e.g. from Windows as well as from Linux.
Pairing of HTML files

How to use DocFetcher tool to Index your book mark pages and other online pages that of interest to you

You can use the ScrapBook (Firefox plugin) for this purpose.
https://addons.mozilla.org/en-US/firefox/addon/scrapbook/

ScrapBook is a Firefox plugins that allows you to save web pages and manage your collection of saved pages.
DocFetcher can be used for full-text search in your ScrapBook collection.

Store all the scrapbook collection to some directory and add this directory to the DocFether tool for indexing.

SOA 11g NTLM Setup

This article explains how to configure NTLM protected web Service from the SOA 11g , 

This contains all the steps required to configure a Active Directory , DNS Server and NTLM based Web Service and integrating with SOA 11g etc.

As the setup needs lot of manual setup's I documented all the important steps so that you will not be wasting much time like I did in this case ,

Important points :-
Create a AD Domain first , make sure you select the DNS Server part of this AD Setup , if you do not select this step then NTLM may not work properly.

You can use the tool , dcpromo for this purpose ,

Refer to this blog for the Active Directory Install ,

http://helpdeskgeek.com/how-to/windows-2003-active-directory-setupdcpromo/

Open the DNS Server Setup on the Windows 2003 machine and put your actual DNS machine as forward DNS to this DNS Sever. 
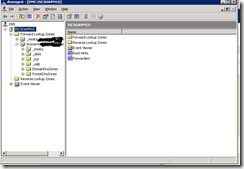
Image(11)

And Add the DNS Servers To the list , 

Image(12)

and restart the Windows 2003 domain , 

Now login in to the test Windows XP machine

In the DNS Server specificy the your Active Directory Machine name , As you have to setup your main DNS Server

as the forward DNS in the Windows 2003 , you will not have any problems in accessing the other machines in your setup.
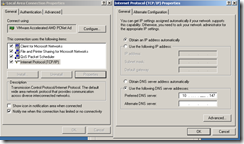
Image(13)

Go to My Computer Properties and use the AD Domain machine , for example ,
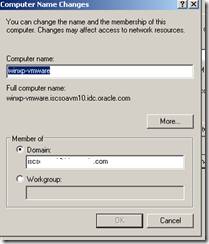
Image(14)

Create a test user from Windows 2003 domain and use this user to login to Windows 2003 domain , for example

Image(4)

Now install the IIS Server on the Windows 2003 machine , Click on Add or Remove programs and Add/Remove Windows Components
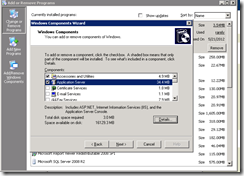
Image(5)

Install .Net FrameWork SDK , i.e .NET 4.0.X on this machine ,

Invoke the inetmgr (IIS Admin tool ) and Create a Virtual Directory say c:\temp\test1

Image(6)

Under Directory Server for this Virtual Directory remove the Enable Anonymous access and click 

on Integrated Windows Authentication ,

Image(7)

Create a Simple HTML File with the following on this ,

<html>
<head>
<meta content="text/html; charset=ISO-8859-1"
http-equiv="Content-Type">
<title>Test Page IIS</title>
</head>
<body>
Hello Test<br>
</body>
</html> 

Access the URL using ,

http://iscsoavm10.mydomain.com/test1/test.html

This asks for a username and password on a plain machine , 

If you access this URL using a machine , that is already logged in to this domain , then it will not ask for the password. This is what NTLM about.

For testing the ASP.Net file create the following test.aspx file ,

<%@ Page Language="C#" %>
<html>
<head>
<title>ASP.NET Hello World</title>
</head>
<body bgcolor="#FFFFFF">
<p><%= "Hello World!" %></p>
<p><%= User.Identity.Name %></p>
</body>
</html>

Copy this file in c:\temp\test1 directory and run the

http://iscsoavm10.mydomain.com/test1/test.aspx

This displays the o/p as 

Hello World!

ISCSOAVM100\Administrator

Using Visual C# Studio create a Sample Web Service 

In the Web.config file have the following entries ,

==========================================================================================

<?xml version="1.0"?>
<configuration>
  <appSettings/>
  <connectionStrings/>
  <system.web>
    <compilation>
    </compilation>
    <!--
        The <authentication> section enables configuration
        of the security authentication mode used by
        ASP.NET to identify an incoming user.
    -->
    <authentication mode="Windows" />
    <!--
        The <customErrors> section enables configuration
        of what to do if/when an unhandled error occurs
        during the execution of a request. Specifically,
        it enables developers to configure html error pages
        to be displayed in place of a error stack trace.
        <customErrors mode="RemoteOnly" defaultRedirect="GenericErrorPage.htm">
         <error statusCode="403" redirect="NoAccess.htm"/>
         <error statusCode="404" redirect="FileNotFound.htm"/>
        </customErrors>
      -->
  </system.web>
  <system.webServer>
    <!--
        To browse web app root directory during debugging, set the value below to true.
        Set to false before deployment to avoid disclosing web app folder information.
      -->
    <directoryBrowse enabled="true"/>
  </system.webServer>
  <system.serviceModel>
    <services>
      <service name="WcfService3.Service1" behaviorConfiguration="WcfService3.Service1Behavior">
        <!-- Service Endpoints -->
        <endpoint address="" binding="basicHttpBinding"  bindingConfiguration="BasicHttpEndpointBinding" contract="WcfService3.IService1">
          <!--
              Upon deployment, the following identity element should be removed or replaced to reflect the
              identity under which the deployed service runs.  If removed, WCF will infer an appropriate identity
              automatically.
          -->
          <identity>
            <dns value="localhost"/>
          </identity>
        </endpoint>
        <endpoint address="mex" binding="basicHttpBinding"    contract="IMetadataExchange" bindingConfiguration="BasicHttpEndpointBinding" />
      </service>
    </services>
    <behaviors>
      <serviceBehaviors>
        <behavior name="WcfService3.Service1Behavior">
          <!-- To avoid disclosing metadata information, set the value below to false before deployment -->
          <serviceMetadata httpGetEnabled="true"/>
          <!-- To receive exception details in faults for debugging purposes, set the value below to true.  Set to false before deployment to avoid disclosing exception information -->
          <serviceDebug includeExceptionDetailInFaults="true"/>
        </behavior>
      </serviceBehaviors>
    </behaviors>
     <bindings>
<basicHttpBinding>
<binding name="BasicHttpEndpointBinding">
<security mode="TransportCredentialOnly">
<transport clientCredentialType="Windows" />
</security>
</binding>
</basicHttpBinding>
</bindings>
  </system.serviceModel>
</configuration>

==========================================================================================

The important one's are 

     <bindings>
<basicHttpBinding>
<binding name="BasicHttpEndpointBinding">
<security mode="TransportCredentialOnly">
<transport clientCredentialType="Windows" />
</security>
</binding>
</basicHttpBinding>
</bindings>

  <endpoint address="" binding="basicHttpBinding"  bindingConfiguration="BasicHttpEndpointBinding" contract="WcfService3.IService1">

   <endpoint address="mex" binding="basicHttpBinding"    contract="IMetadataExchange" bindingConfiguration="BasicHttpEndpointBinding" />

With out this , you may get lot of exceptions like 'anonymous' users are not allowed etc ,

Web Service Code 

---------------------

using System;

using System.Collections.Generic;

using System.Runtime.Serialization;

using System.ServiceModel;

using System.Text;

using System.Web;

using System.ServiceModel;

namespace WcfService3

{

// NOTE: You can use the "Rename" command on the "Refactor" menu to change the class name "Service1" in code, svc and config file together.

// NOTE: In order to launch WCF Test Client for testing this service, please select Service1.svc or Service1.svc.cs at the Solution Explorer and start debugging.

public class Service1 : IService1

    {

public string GetData( int value)

        {

//  OperationContext.Current.ServiceSecurityContext.WindowsIdentity.Name

// Create stream writer object and pass it the file path

StringBuilder sw = new StringBuilder ();

            sw.AppendLine( "--------> " + value);

return string.Format( "You entered: {0}", sw.ToString());

        }

public CompositeType GetDataUsingDataContract(CompositeType composite)

        {

if (composite == null)

            {

throw new ArgumentNullException("composite" );

            }

if (composite.BoolValue)

            {

                composite.StringValue += "Suffix";

            }

return composite;

        }

    }

}

Web Services Interface Code 

===========================

using System;

using System.Collections.Generic;

using System.Runtime.Serialization;

using System.ServiceModel;

using System.Text;

namespace WcfService3

{

// NOTE: You can use the "Rename" command on the "Refactor" menu to change the interface name "IService1" in both code and config file together.

    [ServiceContract]

public interface IService1

    {

        [ OperationContract]

string GetData( int value);

        [ OperationContract]

CompositeType GetDataUsingDataContract(CompositeType composite);

// TODO: Add your service operations here

    }

// Use a data contract as illustrated in the sample below to add composite types to service operations.

    [DataContract]

public class CompositeType

    {

bool boolValue = true;

string stringValue = "Hello ";

        [ DataMember]

public bool BoolValue

        {

get { return boolValue; }

set { boolValue = value; }

        }

        [ DataMember]

public string StringValue

        {

get { return stringValue; }

set { stringValue = value; }

        }

    }

}

From Visual Studio Create a New Publish Profile with the directory as say c:\temp\test

and publish this Web Service to this directory.

If the C# Visual studio and IIS server are there on a different machines then copy the  contents c:\temp\test to the IIS Server directory.

From the Browser access the URL ,

http://iscsoavm10.mydomain.com/test1/Service1.svc

This should ask for a password, enter the username as test and Welcome1.

Now from SOAP UI 
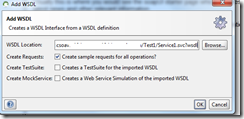
Image(15)

Image(9)

Click on Auth from the SOAP UI

Image(16)

From JDeveloper you have to first download the wsdl file and the related XSD files manually ,

First download the wsdl file , 

http://iscsoavm10.iscsoavm10.mydomain.com/Test1/Service1.svc?wsdl

In this wsdl file , you will find you need 3 xsd files ,

<xsd:import schemaLocation="http://iscsoavm10.iscsoavm10.mydomain.com/Test1/Service1.svc?xsd=xsd0" namespace="http://tempuri.org/"/>

<xsd:import schemaLocation="http://iscsoavm10.iscsoavm10.mydomain.com/Test1/Service1.svc?xsd=xsd1" namespace="http://schemas.microsoft.com/2003/10/Serialization/"/>

<xsd:import schemaLocation="http://iscsoavm10.iscsoavm10.mydomain.com/Test1/Service1.svc?xsd=xsd2" namespace="http://schemas.datacontract.org/2004/07/WcfService3"/>

Download the xsd files ,

http://iscsoavm10.iscsoavm10.mydomain.com/Test1/Service1.svc?xsd=xsd0 as xsd0.xsd

http://iscsoavm10.iscsoavm10.mydomain.com/Test1/Service1.svc?xsd=xsd1  as xsd1.xsd

http://iscsoavm10.iscsoavm10.mydomain.com/Test1/Service1.svc?xsd=xsd2  as xsd2.xsd

and change the downloaded wsdl file 

<xsd:import schemaLocation="xsd/xsd0.xsd" namespace="http://tempuri.org/"/>

<xsd:import schemaLocation="xsd/xsd2.xsd" namespace="http://schemas.microsoft.com/2003/10/Serialization/"/>

<xsd:import schemaLocation="xsd/xsd2.xsd" namespace="http://schemas.datacontract.org/2004/07/WcfService3"/>

And create a simple BPEL to call this service , 

In the composite.xml file have the following entries ,

oracle.webservices.auth.username

oracle.webservices.auth.password

oracle.webservices.preemptiveBasicAuth as false ,

for example , 

<binding.ws port="http://tempuri.org/#wsdl.endpoint(Service1/BasicHttpBinding_IService1)"
                location="test1.wsdl" soapVersion="1.1">
      <property name="weblogic.wsee.wsat.transaction.flowOption"
                type="xs:string" many="false">WSDLDriven</property>
                 <property name="oracle.webservices.auth.username"  type="xs:string" many="false">test</property>
                 <property name="oracle.webservices.auth.password"  type="xs:string" many="false">Welcome1</property>
                 <property name="oracle.webservices.preemptiveBasicAuth"  type="xs:string" many="false">false</property>
    </binding.ws>

You can also set these properties from EM Console , 

Click on your SOA project , and Services and References

and Click on Web Service you are calling and Click on the Proprties TAB , here you can enter the values for 

oracle.webservices.auth.username

oracle.webservices.auth.password

oracle.webservices.preemptiveBasicAuth

Image(17)

Thursday, July 12, 2012

How to run a unix command remotely using java


Download the jar file from ,

http://www.jcraft.com/jsch/

http://nchc.dl.sourceforge.net/project/jsch/jsch.jar/0.1.48/jsch-0.1.48.jar

package test1;
import com.jcraft.jsch.*;
import java.io.*;
public class Class2 {
  public Class2() {
    super();
  }
  public static void main(String[] args) throws Exception {
    testconnect();
  }
      public static void testconnect() throws JSchException, IOException {
           String userName = "xxxx";
           String password ="xxxx";
           String hostName = "xxx.xx.oracle.com";
           int port = 22;
        String sdstestCommand = "env";
              JSch jsch = new JSch();
              Session session = jsch.getSession(userName, hostName, port);
              session.setConfig("StrictHostKeyChecking", "no");
              session.setPassword(password);
              session.connect();    
              ChannelExec channel = (ChannelExec) session.openChannel("exec");
              channel.setCommand(sdstestCommand);
              channel.setInputStream(null);
              ((ChannelExec) channel).setErrStream(System.err);
              InputStream in = channel.getInputStream();
              channel.connect();
              System.out.println("Unix system connected...");
              byte[] tmp = new byte[1024];
              while (true){
                  while (in.available() > 0) {
                      int i = in.read(tmp, 0, 1024);
                      if (i < 0) {
                          break;
                      }
                      String line = new String(tmp, 0, i);
                      System.out.println("Unix system console output: " +line);
                  }
                  if (channel.isClosed()){
                      break;
                  }
                  try {
                      Thread.sleep(1000);
                  } catch (Exception ee){
                      //ignore
                  }
              }
              channel.disconnect();
              session.disconnect();     
          }
    }

Wednesday, July 11, 2012

SOA 11g using ant scripts to deploy and undeploy


1. First Set JAVA_HOME

set JAVA_HOME=D:\fmw1115\Middleware\jdk160_24

2. set PATH=D:\fmw1115\Middleware\modules\org.apache.ant_1.7.1\bin;%PATH%
3. cd D:\fmw1115\Middleware\jdeveloper\bin

4. Note the down the directory where your SOA Project is there 

D:\bugs-download\Bug14258512\RuleAPITest\RuleAPITest\HelloSOA

5. Compile and package the soa project

ant -f ant-sca-package.xml -DcompositeDir=D:\bugs-download\Bug14258512\RuleAPITest\RuleAPITest\HelloSOA  -DcompositeName=HelloSOA  -Drevision=1.0  -Dscac.application.home=D:\bugs-download\Bug14258512\RuleAPITest\RuleAPITest
6. Deploy the SOA Project
ant -f ant-sca-deploy.xml  -DserverURL=http://localhost:7001  -DsarLocation=D:\bugs-download\Bug14258512\RuleAPITest\RuleAPITest\HelloSOA\deploy\sca_HelloSOA_rev1.0.jar  -Doverwrite=true  -Duser=weblogic  -Dpassword=xxxxx
7. To undeploy use the following command ,
ant -f ant-sca-deploy.xml  -DserverURL=http://localhost:7001    -Duser=weblogic  -Dpassword=xxxx  -DcompositeName=BR_FndIntg_SimpleRuleIVP -Drevision=6.18 undeploy


Using this batch script , you can deploy the same composite with say 100 revisions

----------------
@REM initialize test value to be "true"
@SET intCounter=1
:while
@REM test condition
@IF %intCounter% GTR 100 (GOTO wend)
@REM procedure where condition is "true"
@echo ==============================================================================================================
@echo %intCounter%
Rem call ant -f ant-sca-package.xml -DcompositeDir=D:\bugs-download\Bug14258512\RuleAPITest\RuleAPITest\SimpleRule  -DcompositeName=SimpleRule  -Drevision=%intCounter%.0  -Dscac.application.home=D:\bugs-download
\Bug14258512\RuleAPITest\RuleAPITest
Rem call ant -f ant-sca-deploy.xml  -DserverURL=http://localhost:7001  -DsarLocation=D:\bugs-download\Bug14258512\RuleAPITest\RuleAPITest\SimpleRule\deploy\sca_SimpleRule_rev%intCounter%.0.jar  -Doverwrite=true  -
Duser=weblogic  -Dpassword=xxxxxx
call ant -f ant-sca-deploy.xml  -DserverURL=http://localhost:7001    -Duser=weblogic  -Dpassword=xxxxx-DcompositeName=SimpleRule  -Drevision=%intCounter%.0 undeploy
@REM set new test value
@SET /a intCounter=intCounter+1
@REM loop
@echo ==============================================================================================================
@GOTO while
:wend

-----------------

Monday, June 04, 2012

How to Check whether the Schema is Valid or not in a Java Program


import java.io.File;
import javax.xml.XMLConstants;
import javax.xml.validation.Schema;
import javax.xml.validation.SchemaFactory;
public class Test {
  public static void main(String[] args) throws Exception{
      SchemaFactory sf =
SchemaFactory.newInstance(XMLConstants.W3C_XML_SCHEMA_NS_URI);
    Schema schema =    sf.newSchema(new
File("D:\\temp\\xx1\\InstalledBase.xsd"));
  }
}

Thursday, April 19, 2012

SOA Email James Configuration


http://niallcblogs.blogspot.in/2009/10/email-activation-with-oracle-soa-suite.html

http://niallcblogs.blogspot.in/2009/10/email-notifications-with-oracle-soa.html

Download from http://james.apache.org/

Unzip to a directory of your choice

Start James

by running the run.bat or run.sh

on linux you have to start the run.sh as root user , stop the sendmailservice before running

service sendmail stop

telnet localhost 4555 (use the password as root/root)
adduser bpelsender welcome1
adduser bpelreceiver welcome1
adduser jcooper welcome1 

Configure Email client for jcooper, bpelsender etc.
·Configure your email client e.g. thunderbird
File->New->Mail Account 

Give the email account name and email  as jcooper@localhost

Thursday, March 22, 2012

Execute commands remotely from unix shell


The ssh command on linux does not support passing the passwords at the command line ,

You need to use the sshpass command. It is a utility designed for running ssh using the mode referred to as "keyboard-interactive" password authentication, but in non-interactive mode. You can install it as follows:

rpm –ivh ftp://ftp.muug.mb.ca/mirror/fedora/epel/5/i386/sshpass-1.05-1.el5.i386.rpm

sshpass -p 'root-password' ssh -o StrictHostKeyChecking=no  root@localhost " du  --exclude=/shared  --exclude=/shared2 -Sm / | sort -nr | head -10"

sshpass -p 'root-password' ssh -o StrictHostKeyChecking=no  root@localhost " uptime "

Tuesday, March 13, 2012

Steps to Apply the JDeveloper stand alone patches


First download the standalone opatch using the patch number  5912518.
Assuming my JDev Home is : d:\fmw1115\Middleware\jdeveloper
copy d:\p5912518_111000_GENERIC.zip cd d:\fmw1115\Middleware\jdeveloper
cd d:\fmw1115\Middleware\jdeveloper
unzip -d . p5912518_111000_GENERIC.zip
set  ORACLE_HOME=d:\fmw1115\Middleware\jdeveloper
set PATH=d:\fmw1115\Middleware\jdeveloper\OPatch;%PATH%
cd C:\temp\13607268
First try ,
opatch version -jdk d:\fmw1115\Middleware\jdk160_24
Invoking Standalone OPatch 11.1.0.0.0
OPatch Version: 11.1.0.0.0
OPatch succeeded.
Now Apply the patch using ,
opatch apply -jdk d:\fmw1115\Middleware\jdk160_24
If you are applying the patch for the first time then you will see ,
> OPatch finds no 'product.xml' in Oracle Home and will attempt to create 'product.xml' file.
>
> Attempting to retrieve patch inventory's "product" and its "version" information...
>
> Please enter your choice to enable OPatch to create 'product.xml' file or quit creation...
>
>
> Choice Product Version
> ------ ------- -------
> 1 SA_JDEV 11.1.1.5.0
>
> 2. If you wish, quit 'product.xml' creation
>
> Please enter [1-2]:
> 1
> User Responded with: 1
>
> OPatch will put the information of selected product 'SA_JDEV' and selected version '11.1.1.3.0'
> in product.xml during inventory updation.
> "
Now run the command to verify whether the patch applied or not ,
C:\temp\13607268>opatch lsinventory -jdk d:\fmw1115\Middleware\jdk160_24
To remove the patch  run the command ,
cd C:\temp\13607268
opatch rollback -id 13607268 -jdk d:\fmw1115\Middleware\jdk160_24

How to apply patches to a BPM and/or SOA environment in 11.1.1.3 (Doc ID 1288864.1)

Friday, March 09, 2012

How to measure the time it takes to load a web page


Many times you need to find out the how long a web page takes to load when troubleshooting performance related
problems.

Here are the steps that you can use with the WebLogic Server 11g.

Home >Summary of Servers >AdminServer
Click on Loggin TAB -> HTTP and go to the Advanced Options

Select the Format as "Extended"
and add the field " time-taken" to the Extended Logging Format Fields.
For example after adding it will be
"date time cs-method cs-uri sc-status time-taken"

After this you need to restart the Server ,

This is the WLST script to do the same ,

connect('weblogic', 'Welcome1', 't3://localhost:7001')
startEdit()

cd('/Servers/AdminServer/WebServer/AdminServer/WebServerLog/AdminServer')
cmo.setLogFileFormat('extended')
cmo.setELFFields('date time cs-method cs-uri sc-status time-taken')

activate()
disconnect()
exit()

After this you need to restart the Server ,

Check the access_log file entries ,

2012-03-09      14:19:16        GET     /em/faces/targetauth/emasLogin?target=Farm_soa_domain&type=oracle_ias_farm&FromContextInitFilter=true&_afrLoop=18992901037066&_afrWindowMode=0&_afrWindowId=null    200     0.066
2012-03-09      14:19:20        GET     /em/LoginStatusServlet?loginReqTime4emas=rlt_1331282958512_0.31560349677888955  2000.0040

The last column indicates the time.

You can measure the timings from browser also ,

for this use the FireFox version > 4.0 , here you can use the Tools-> Web Console or Tools -> Web Developer -> Web Console option.

Or you can use the fiddler tool to measure the time it takes to load web page ,
download the fiddler from ,
http://fiddler2.com/fiddler2/

Fiddle tool can be used with IE or firefox.

Wednesday, March 07, 2012

Unable to start the WebLogic Server weblogic.security.SecurityInitializationException: Authentication for user weblogic denied


Getting the following exception when trying to start the WebLogic Server

<Mar 7, 2012 3:57:29 PM IST> <Critical> <WebLogicServer> <BEA-000386> <Server subsystem failed. Reason: weblogic.security.SecurityInitializationException: Authentication for user weblogic denied
weblogic.security.SecurityInitializationException: Authentication for user weblogic denied
        at weblogic.security.service.CommonSecurityServiceManagerDelegateImpl.doBootAuthorization(CommonSecurityServiceManagerDelegateImpl.java:965)
        at weblogic.security.service.CommonSecurityServiceManagerDelegateImpl.initialize(CommonSecurityServiceManagerDelegateImpl.java:1050)
        at weblogic.security.service.SecurityServiceManager.initialize(SecurityServiceManager.java:873)
        at weblogic.security.SecurityService.start(SecurityService.java:141)
        at weblogic.t3.srvr.SubsystemRequest.run(SubsystemRequest.java:64)
        Truncated. see log file for complete stacktrace
Caused By: javax.security.auth.login.FailedLoginException: [Security:090303]Authentication Failed: User weblogic weblogic.security.providers.authentication.LDAPAtnDelegateException: [Security:090295]caught unexpected exception
        at weblogic.security.providers.authentication.LDAPAtnLoginModuleImpl.login(LDAPAtnLoginModuleImpl.java:251)
        at com.bea.common.security.internal.service.LoginModuleWrapper$1.run(LoginModuleWrapper.java:110)
        at java.security.AccessController.doPrivileged(Native Method)
        at com.bea.common.security.internal.service.LoginModuleWrapper.login(LoginModuleWrapper.java:106)
        at sun.reflect.NativeMethodAccessorImpl.invoke0(Native Method)
        Truncated. see log file for complete stacktrace


Follow the following steps:
1: remove the boot.properties file completely from the managed server directory.
2: remove the ManagedServerDir/data/ldap directory completely.
3: Always keep backup of files before removing it.
4: Now try to start the server from the command prompt and provide the username/password used to login to the Admin Console.

Monday, March 05, 2012

WLST SOA MBeans Examples


// Get the deployed Composites

connect('weblogic', 'Welcome1', 't3://localhost:7001')
domainRuntime()
soaBean = ObjectName('oracle.soa.config:Location=AdminServer,name=soa-infra,j2eeType=CompositeLifecycleConfig,Application=soa-infra')
print soaBean
composites = mbs.getAttribute(soaBean, 'DeployedComposites')
for composite in composites: 
print 'composite: ',composite 
disconnect()
exit()


// Change the Composite auditLevel to Development

print 'starting the script ....'
username = 'weblogic'
password = 'Welcome1'
url='t3://localhost:7001'

connect(username,password,url)

domainRuntime()

helloworldComposite = ObjectName('oracle.soa.config:Location=AdminServer,partition=default,j2eeType=SCAComposite,revision=1.0,label=soa_2073ceb3-d703-453f-8867-79d3b44d637c,Application=soa-infra,wsconfigtype=WebServicesConfig,name="File1"')
print helloworldComposite
params = ['auditLevel','Development']
sign = ['java.lang.String','java.lang.String']
mbs.invoke(helloworldComposite, 'setProperty', params, sign)
print mbs.getAttribute(helloworldComposite, 'Properties')
disconnect()
exit()
disconnect()
exit()


// Print the Composite Properties

print 'starting the script ....'
username = 'weblogic'
password = 'Welcome1'
url='t3://localhost:7001'

connect(username,password,url)

domainRuntime()

helloworldComposite = ObjectName('oracle.soa.config:SCAComposite.SCAService=Test1,name=AdapterBinding,revision=1.0,partition=default,SCAComposite="File1",Location=AdminServer,label=soa_2073ceb3-d703-453f-8867-79d3b44d637c,j2eeType=SCAComposite.SCAService.SCABinding,Application=soa-infra')
print helloworldComposite
print mbs.getAttribute(helloworldComposite, 'Properties')
disconnect()
exit()
disconnect()
exit()

// Change the ExcludeFiles property of the File Adapter

print 'starting the script ....'
username = 'weblogic'
password = 'Welcome1'
url='t3://localhost:7001'

connect(username,password,url)

domainRuntime()

helloworldComposite = ObjectName('oracle.soa.config:SCAComposite.SCAService=Test1,name=AdapterBinding,revision=1.0,partition=default,SCAComposite="File1",Location=AdminServer,label=soa_2073ceb3-d703-453f-8867-79d3b44d637c,j2eeType=SCAComposite.SCAService.SCABinding,Application=soa-infra')
print helloworldComposite
print '-----------Before Changes------------------'
print mbs.getAttribute(helloworldComposite, 'Properties')
params = ['ExcludeFiles','*.akshay*']
sign = ['java.lang.String','java.lang.String']
mbs.invoke(helloworldComposite, 'setStringProperty', params, sign)
print '-----------After Changes------------------'
print mbs.getAttribute(helloworldComposite, 'Properties')
disconnect()
exit()
disconnect()
exit()

// Display the MDS listPartitions

connect('weblogic', 'Welcome1', 't3://localhost:7001')
domainRuntime()

mdsBean = ObjectName('oracle.mds.lcm:name=MDSDomainRuntime,type=MDSDomainRuntime')

print 'invoke listRepositories without parameters on mds bean'
repositories = mbs.invoke(mdsBean, 'listRepositories',None,None)
for repository in repositories:
mdsObject = ObjectName(repository)
Name = mbs.getAttribute(mdsObject, 'Name')
print 'mds repository object: ', Name
params = [Name]
sign = ['java.lang.String']
partitions = mbs.invoke(mdsBean, "listPartitions", params, sign)
for partition in partitions:
   print 'partition: ', partition
disconnect()
exit()

Thursday, February 23, 2012

BPEL Process to display the IP Address of a hostname


Create a BPEL process with the following java embded code ,
<bpelx:exec import="java.net.*"/>
    <bpelx:exec name="Java_Embedding_1" language="java" version="1.3">
      <![CDATA[String ipaddr = (String)getVariableData("stringvar");   
System.out.println(ipaddr); 
try { 
        InetAddress addr1 = InetAddress.getByName(ipaddr); 
          byte[] ipAddr = addr1.getAddress(); 
          // Convert to dot representation 
          String ipAddrStr = ""; 
          for (int i=0; i<ipAddr.length; i++) { 
              if (i > 0) { 
                  ipAddrStr += "."; 
              } 
              ipAddrStr += ipAddr[i]&0xFF; 
          } 
      System.out.println(" Lookup Host Name " +addr1 +" --> " +ipAddrStr); 
      ipaddr = ipAddrStr;
} 
catch(Exception e1) { 
e1.printStackTrace(); 
}
setVariableData("stringvar",ipaddr);]]>
    </bpelx:exec>
Please refer to the Java Doc for the API call's that you can use in BPEL java
http://docs.oracle.com/cd/B31017_01/integrate.1013/b28986/com/collaxa/cube/engine/ext/BaseBPELXExecLet.html
http://technology.amis.nl/blog/2387/embedding-java-in-bpel-process
http://niallcblogs.blogspot.in/2008/01/bpel-embedded-java.html

Thursday, February 02, 2012

EJB Out Bound Example in SOA


1. Create a Simple EJB HelloWorld Application and deploy this to the WebLogic Server

Refer to the file below for the example ,

Hello EJB Example

2. Create a new composite and create a mediator component ,

3. In the External Reference drop the ejb Service and specify the EJB JNDI Binding Name  say

OS9SOAApplication-HelloEJB-HelloEJB#test.os9.model.HelloEJB

EJB-Jar file :

and Java Interface : test.os9.model.HelloEJB

4. Wire the EJB Outbound Service to the mediator and perform the XML transformations and run the example ,

Refer to the file in the link given below ,

Calling EJB from Mediator/BPEL

Simple inbound ejb example ,


1. Create a java file with the following contents

package test.os9;
//import javax.ejb.Remote;
//@Remote
public interface Hello {
public String sayHello(String input);
}

Compile this file , create a class file and create a jar file and copy the jar file to SCA-INF\lib directory

2. Create an EJB Binding in the Services lane, based on this Java interface. Specify the JNDI Name for this EJB. For example: ejb/EjbBind and select the above interface file and the jar

3. Create a Mediator with no interface definition and Wire this mediator to this EJB Service

4. Create a BPEL process and wire this to the Medaitor

5. Create the mappings for the mediator

6. Create an EJB Client with the following code ,

package test.os9;
import java.util.Hashtable;
import javax.naming.Context;
import javax.naming.InitialContext;
import javax.naming.NamingException;
public class EjbClient {
  public EjbClient() {
    super();
  }
  public static void main(String[] args) {
    EjbClient ejbClient = new EjbClient();
    try {
     final Context context = getInitialContext();
     Hello hello = (Hello)context.lookup("ejb/EjbBind");
     System.out.println(hello.sayHello("hello ravi"));
     } catch (Exception ex) {
     ex.printStackTrace();
     }
  }
  private static Context getInitialContext() throws NamingException {
  Hashtable env = new Hashtable();
  // WebLogic Server 10.x connection details
  env.put( Context.INITIAL_CONTEXT_FACTORY, "weblogic.jndi.WLInitialContextFactory" );
  env.put(Context.PROVIDER_URL, "t3://xxx.xxx.oracle.com:7001");
    env.put(Context.SECURITY_PRINCIPAL,"weblogic");
    env.put(Context.SECURITY_CREDENTIALS,"xxxxx");
  return new InitialContext( env );
  }
}

Add the following libraries to compile the class files 

   "EJB 3.0" and "WebLogic 10.3 Remote-Client"

Here is the example ,

Download Example

Tuesday, January 24, 2012

How to increase JVM Memory Size for JDeveloper 11g

Open the file D:\fmw1115\Middleware\jdeveloper\ide\bin\ide.conf

and change the lines

AddVMOption -Xmx1024M
AddVMOption -Xms128M

Also open the file D:\fmw1115\Middleware\jdeveloper\jdev\bin\jdev.conf

and change the line

AddVMOption -XX:MaxPermSize=256M

Thursday, December 01, 2011

How to Add a Hard Disk Space to Oracle VM


1. Create a 30GB file ,

dd if=/dev/zero of=fmw11g.img  bs=1024k count=30000

2. Add the file /OVM/linuxvm/fmw11g.img
to the vm.cfg file , for example ,

disk = ['file:/OVM/linuxvm/System.img,xvda,w','file:/OVM/linuxvm/fmw11g.img,xvdb,w',]

3. Now start the VM by using the command ,
xm create vm.cfg

4. In the fdisk -l command , you should be able to see this file ,

For example ,

fdisk -l

Disk /dev/xvda: 12.8 GB, 12884901888 bytes
255 heads, 63 sectors/track, 1566 cylinders
Units = cylinders of 16065 * 512 = 8225280 bytes

    Device Boot      Start         End      Blocks   Id  System
/dev/xvda1   *           1          13      104391   83  Linux
/dev/xvda2              14        1264    10048657+  83  Linux
/dev/xvda3            1265        1566     2425815   82  Linux swap / Solaris

Disk /dev/xvdb: 31.4 GB, 31457280000 bytes
255 heads, 63 sectors/track, 3824 cylinders
Units = cylinders of 16065 * 512 = 8225280 bytes

5. using fdisk /dev/xvdb command create a partion and format that partition
using the command ,

mkfs.ext3 /dev/xvdb1

6. After this mount this file system by adding this entry to the /etc/fstab file ,
/dev/xvdb1             /fmw11g                   ext3    defaults        1 2

run the command , mount -a

Friday, November 25, 2011

Find out whether a Schema is Valid or Not


Some times in SOA you need to find out whether the schema you have designed/developed is valid and conforms to XML schema standards etc.

For this you can use the JDK 1.6 tool xjc.exe to check ,

%JDK_HOME%\bin\xjc.exe <your-schema-file> and check whether you are getting errors or not.
When I ran the xjc command with the original schmea , I got the errors
parsing a schema...
[ERROR] sch-props-correct.2: A schema cannot contain two global components with the same name; this schema contains two occurrences of 'party,IdentificationType'.
  line 45 of file:/D:/bugs-download/Bug12965191/restriction_example/restriction/schema-restriction/xsd/party/party.xsd
[ERROR] rcase-Recurse.2: There is not a complete functional mapping between the particles.
  line 7 of file:/D:/bugs-download/Bug12965191/restriction_example/restriction/schema-restriction/xsd/local-party.xsd
[ERROR] derivation-ok-restriction.5.4.2: Error for type 'LocalPartyType7'.  The particle of the type is not a valid restriction of the particle of the base.
  line 7 of file:/D:/bugs-download/Bug12965191/restriction_example/restriction/schema-restriction/xsd/local-party.xsd
Failed to parse a schema.

The above error indicates that schema is not a valid schema.